Tuesday 26 April 2011

Last of the uploads

Yes finally up to date!
These are the last few cards made that I needed to up load!
Some lovely papers, Diary of Edwardian Lady, matted on the green, added a tag and distressed the edges of each.  Then stamped the sentiment "Beauty Lies within" on the paper and the tag.  Then added the cream bow.

Sold

Another of the Edwardian Lady papers, this time a papermania stamp and the Debbie Moore decorative edge punch to punch the oval and the ribbon strip.  Then added the chipboard shape which coordinates with the paper.

Some brayering work I enjoyed at the weekend - here comes my Barbara Grey moments!  So created the water effect, then using masks created the mountains with the purple, then inked the sky.  Then added the castle stamp (my latest from the new additons club) and then added the reflection.  Then added the tree in the foreground.  I then added the leaves and the edge line.  Finally added some colour to the castle.  To mount used some funky striped paper, some cloudy blue and then mounted on brown.  Then added the metal embellishment which I have a mound of in the stash but never really used much.  Think this is suitable as a male card as well as a female one which is unusual for me.

Another use of the castle stamp and this time the birch tree stamp to create this little cute picture.  The inks are a little too bright really - but I love the birch trees so much I don't mind too much!  Then mounted the card on green and blue, then the green check and added the grosgrain green ribbon bow.  Very nice!

Final one for today.  A cottage stamp, the edwardian papers and some green card to mat and layer.  Then added three pale green pearls for balance.


OK I am really tired of updating the blog now and this is the longest I've been awake for all day so far, so it's time to give up for today!  Some of these lovely cards will be staying in my stash for home, some may make it to Folksy.com and some will end up in the box at work.

Back up and about ...

... and the last few pictures to post!

Some random bits and pieces of cd crafting layered up etc.  Most of them are Country Companions designs.

Some freebie easter papers and elements, ith some ric rac and some paper flowers and buttons to embellish.

Freebie cute stamp, a frame that came from a kit ages ago, some paper left over from another card and some lovely ribbon and buttons - very very sweet little card.

This was made for one of M's school friends birthdays - Molly Blooms stamp, Papermania papers (mostly) and glitter and gems to add bling!  Very cute!

Some of the decoupage made up a few weeks ago and only just got around to mounting this one.
Sold

Another of the MCS Perfect Petals print outs to make this easel card.  This is one of the design sheets and made up this from some of the elements.  Added glitter and a stamped image. 

This was the little easter make from Helen's craft class - now filled with easter face chocolates.  Very cute little make!

Some Polka Doodles elements left over from the commission I made, with a stamped sentiment and some added glitter.
Gave this one to a friend who has just moved house!


One more post to come and then I'll be up to date!

Folksy.com

ooooh... i've just discovered Folksy.com.  Have added myself a shop on there and just 2 cards for sale through there ... Please feel free to visit!
And here are some of the random cards I've made over the past week just to use up elements I've got and to make use of my chill out time.  It's a good job princess M also loves crafting - it's a great excuse to get the stash out!


Polka doodles baby from Sundae of Seasons with some "that's what little girls are made of" paper, and a sequin flower embellishment and some organza ribbon.  Added some sequins where the buttons are on the baby too!

Another polka doodles baby (slightly smaller) and some random background paper from a magazine a while ago.  Also some glossy rose embellishments, and some pearls on the frame edges at the top.


Now this is a polka doodles stamp which I have paper pieced for the wing and then layered on some cute paper from inside one of the magazines again.

Now these are pink petticoat stamps, coloured with water colour pencils and then layered on lovely Stampin Up card.  Finished off with a cute ribbon I got at the NEC.

Had a bit of a CD Rom crafting moment on Saturday night printing out quite a bit from the My Craft Studio Perfect Petals cd for something a bit different!  So this is one of the design sheets which includes the topper and the backing papers.  I've then also added some green card stock from my stash and some black and white wooly thread.  Then glittered parts of the design.  Love this - nice and modern!

And the rest of the design sheet is here - layered with white card which I punched with the Martha Stewart punch.  Then glittered around the squares to add the extra dimension.


Another MCS Perfect Petals design sheet.  Gorgeous picture of lily with delicate colours.  Used one mat of the Rich Razzleberry (think thats what its called) from Stampin Up to add some contrast, and then three diamond shaped gems (from Princess M's cBeebies Art magazine - don't tell her!).  Then added some glitter to the flowers to add a little bling!

Again used the rest of the design shee to make this tall card.  Added some distressing with some yellow and green ink (So Saffron and Celery (?) Stampin Up inks) to the edge of the backing paper and to the three elements.  Also added some glitter, a green strip faux ribbon - again from the design sheet - and then three gems at the bottom to add some bling - again!

All of these are going into the work box for sale.  Some more yet to be posted!

Commission 1 and 2

So I wrote about my first commission a while ago and now it's time to post the final piece of work and to show you commission number 2.

So the order was a 30th card with a golf theme.  Firstly I don't do golf or mens cards normally - definately not pretty enough but pleased with the results for this one!  Used a couple of digikits from CraftArtist and DSA to construct the picture, and the backing paper (it's green with a tiny polkadot).  Then printed it out and layered up with some silver paper, and some silver ribbons.  I also decoupaged the tree with a couple of layers and embellished with the buton.  The blue panel is also felt to give it a bit of a different texture going on!  I was pleased with this - and the person who commissioned it was also happy!  Phew!


Now commission number 2!  One of my lovely friends at work has already purchased a few cards from the box and mentioned she would be happy if I put a 50th on one of them so I said I would make one especially!  The first word she used to describe her friend was ditsy - and that said to me Polka Doodles!  So used the Sundae of Seasons CDRom to make this tent card.  Layered up the green and pale blue paper to make the background and then added the cottage in the back, and then the flowery fence at the front.  Also made the sentiment to stick on the side.  Then glittered up the flowers and embellished with the tiny buttons.  Cute!  Fingers crossed she will like this - hopefully tomorrow she'll get to see it in person!

The commissioning has continued too - Mum came back to me with an empty wallet I'd put the cards in I made her for Xmas asking for some more and letting me know the next 2 birthdays are also male ones - a music and football one - so watch this space more commissions to be completed!

Ballerina card

OK so this is a card I made a week or so ago and didn't post as the picture I had wasn't brilliant.  I love this card.  The stamp is a Debbie Moore one I bought at the NEC.  I've coloured it with promarkers, and distressed the edge with spun sugar distress inks.  Also stamped the word Love on from a set of SeeDees I've had for years and hardly used!  The backing paper is one of the Diary of an Edwardian Lady (I think this is what it's called!) which came with a magazine.  Although the papers are a little oldie worldie for me, I've used loads of them as background papers and surprised myself!
Velvet scalloped ribbon down the side and embellished with some lovely paper flowers - also known as deadly flowers!
Why Deadly Flowers?  Because I bought them at the NEC and the wires poked out of the plastic bag and have scratched my calf loads to the point of having rivers of blood trickling down my leg and now I've got some lovely scars to show for it!  So these are now known as the deadly flowers!

Anyway - so pleased with my colouring on this card and really proud of the way it ended up.  This is in the cards for sale box at work so wonder if anyone else will like it enought to pay for it?

Happy Easter!

OK so the blog is a little belated, but after a busy weekend and feeling rubbish from the multiple nose bleeds, i'm sure I can be forgiven!

So what've I been up to?

Well I have many things to post on here so this may have to be done in a few posts so bear with me...


So here are the easter cards Princess M and I made a few weeks ago and have now been lovingly given out to family and friends with easter wishes!

A real mixture of cd rom crafting and freebie papers from magazines.  Enjoy!


And here is one of the princess with the card she made using stickers and hand drawing her version of an easter bunny!  So sweet!  She does have an interesting habit of decorating the inside of the cards and writing on the front instead of inside - not sure why - and for some reason she can't be discouraged from it!


Post 1 completed!


Wednesday 20 April 2011

Technique University

Tonight was Helen's class and three lovely projects as usual.  Only photos of two though - will post the other when complete with eggs!


In reverse order of the completion ...

Two lovely patterned papers  - all materials and stamps and inks are Stampin Up - and gorgeous ribbon.  layered up.  Then the sentiment stamped in black and punched out with the matching punch.  Then several layers of clear embossing until thick and moving around when heat embossed.  I managed to sustain a small injury I don't recommend by putting my thumb in it whilst very hot - ouch!
Then left to cool - we put them in the fridge.  Once cool, crack the surface and hey presto a nice cracked glass effect.  Added the button and put the sentiment on the bottom.  Then I wanted to play with a new stamp set (build a blossom) and stamped the flower (separate petals and flower centre) and just placed the flower behind the sentiment (to keep it safe) but the class all said it looked good so I went with the flow and stuck it down - pleased with my little unique touch!


So this was embossing the motorcycle stamp with very fine embossing powder and then painting with bleach - yes I was dubious - but wow I love the effect as it bleached the paper to make a lovely effect.  Distressed the edge of the paper, mounted on cream (Sorry Helen - can't remember the actual colour you said it was!) and then distressed and edged that with black ink too.  Also added the panel of spotty paper and mounted that on the red (again - no idea which red!) and then small punched shape (word panel I think it is) and added three antique type metal brads.  Love this - not usually good at more masculine cards (although it isn't purely for men!) so pleased I have another string to my bow now!  Now the bathroom will never be cleaned again as the bleach ends up in the crafting stash!

Quick update - this card sold as soon as I got it to work!!!- Thanks Helen for the design and technique!

Thanks Helen for a lovely class - off to find my other classmates blogs and blog hop!  Such fun!

Happy crafting all!

Monday 18 April 2011

Quick digi scrap to relax

After a busy day at work was inspired to create the attached scrap page for a friends son after seeing this picture on facebook ... just adorable!
Not sure whether to send this onto my friend yet or to make an album of them and then present them as a presie at some point ... it's just dependent on whether I can wait to do show her or not I suppose!
Good news is she doesn't know about this blog and so she won't get a sneaky peek!

Enjoy - off to sleep now after last nights awful attempt at sleep I'm hoping tonight I might get more than an hours kip!

Happy crafting all - hopefully tomorrow will be able to upload the pics of the cards made recently so you can see what else I've been upto.

Such fun! 

Sunday 17 April 2011

digi scrapping weekend

Well I have managed some "real" craft but mainly some digi stuff as been playing around with CraftArtist on and off. Such fun!

Been having problems uploading pics this weekend so instead here are a few links to my Daisytrail.com postings instead!

Enjoy!

Happy crafting all!

Link 1: Page for a friend of their bump (Harry) and their eldest Connor.
http://www.daisytrail.com/scrapbook.html?uid=59923

Link 2:  Couple of scrapbook pages of Maya and her school friend Angus the dog when he came for the weekend in March.
http://www.daisytrail.com/scrapbook.html?uid=60026

Wednesday 13 April 2011

First commission

So after finally getting round to organising my immense pile of cards and putting them on display at work at an incredibly reasonable price of £1.50 each not only did I sell two, but also got my first commission.

OK so it's a golf themed card so not my usual kind of thing - but exactly the sort of thing that CraftArtist was made for.  Spent the last little while messing around with the layout and of course as soon as I go to print it the printer runs out of ink and so instead of a green "green", I get a blue one!!!

So here is a sneak preview of the layout for the purposes of the blog --- hopefully I can retweet this to Caroline to have a gander at too --- all thoughts on the general idea welcomed before I print it out again tomorrow, post ink change, and then make it up.  Thinking a bit of decoupage and some button embellishments, but not convinced as yet exactly what to go for... very much open to suggestions!

That's all for tonight folks - happy crafting - I've got 2 days with Princess M lined up so I'm sure we'll "crack" on with some Easter Cards (please pardon the pun!).  Such fun!
<a href="http://www.daisytrail.com/scrapbook.html?uid=59580"><img src="http://dt-live.s3.amazonaws.com/media/scrapbooks/194954/t95779.jpg%22%3E%3C/a>

Not sure if this link thing will work though ... so testing 1,2,3!

Tuesday 12 April 2011

new layout template from LeeLou

Before I sign off for the night (after all it is a work day tomorrow!) I thought I would look at LeeLou's layouts again and see if there was a spring one I fancied to match the time of the year - rather pleased with this one.  Maybe some day I'll fathom out how to put stuff in all the side bits ... but for the moment I really should sleep ... think V might be getting a bit annoyed with my tapping away next to him in bed!

Twitterfeed working!

OK now have established that twitterfeed is working for twitter - no idea how to get facebook to work too but this will have to do for now!  Still no idea how to update blogger from my phone - definitely a job for another day!
Crafty night night to all!

crafty night

So I set out to make an anniversary card for my parents and ended up making a little bit more!  Such fun!

So here goes ...

The anniversary card which started it all off!  Used some freebie papers from cardmaking and papercraft magazine, layered up with red paper, silver paper with the Martha Stewart punch cut along it, then added cream ribbon and the bow.  Then added the chipboard sticker sentiment and the gold dragonfly to the bow.  My mum loves poppies hence the choice of paper.  Pretty, and quite understated I suppose sums this one up!


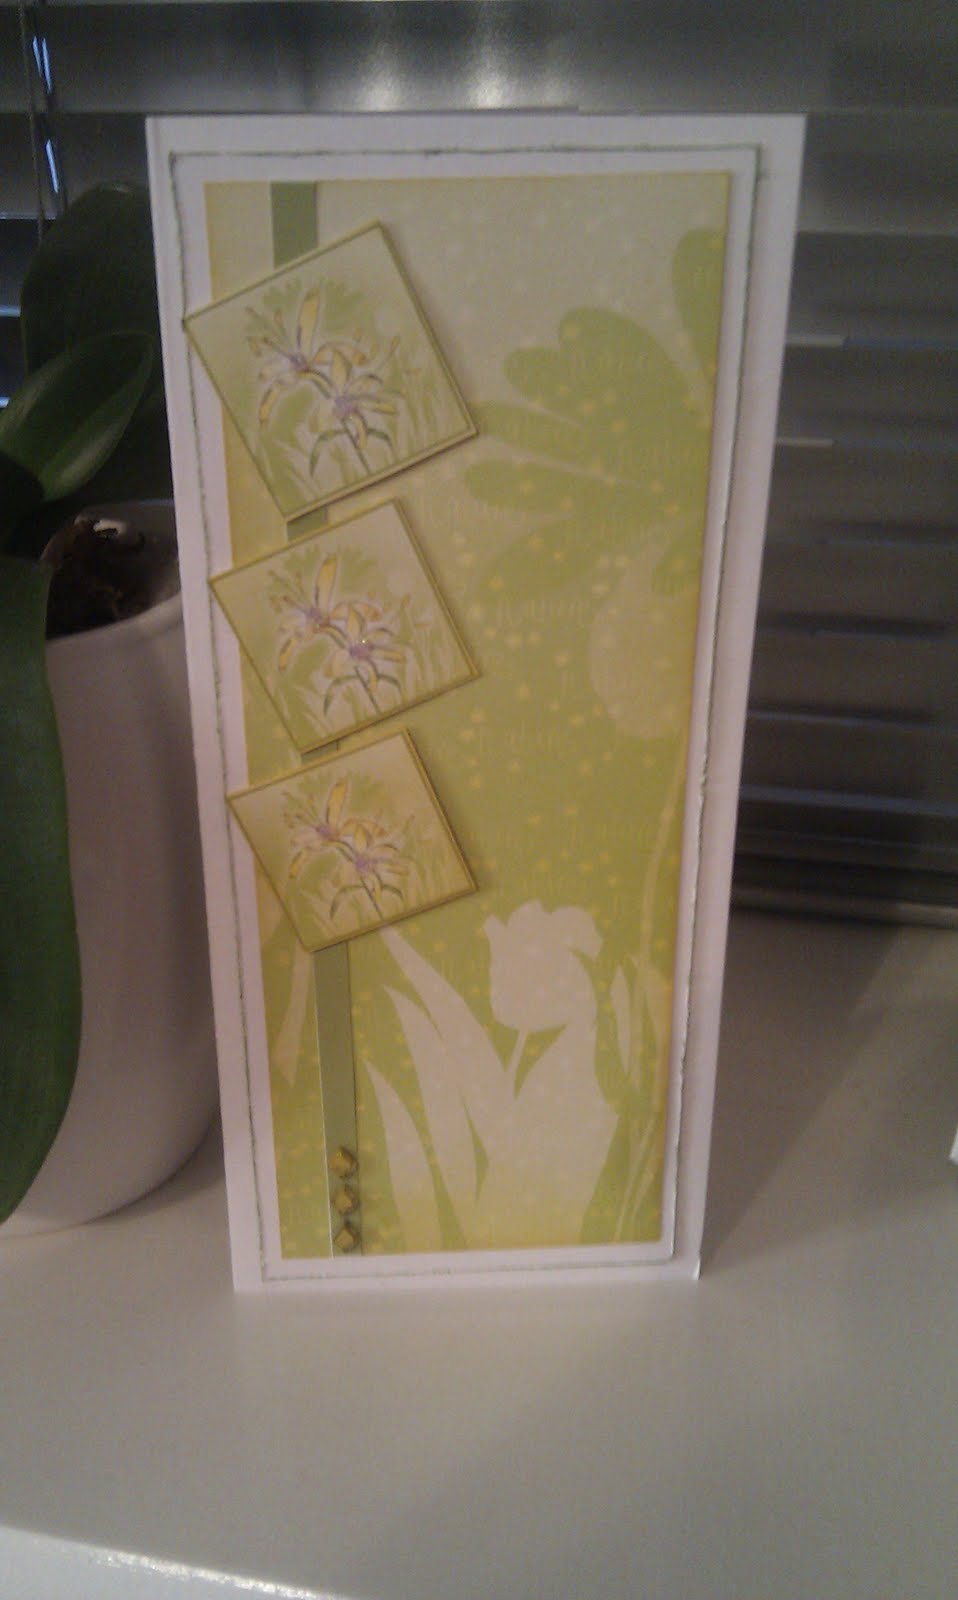
Next were some freebie decoupage pages (again a freebie from a magazine).  Definitely not my usual thing - a bit too cutesy and naff in terms of the picture, but relaxing to put together.  Then mounted it on turqouise, silver and blue picking out the colours in the picture, then added a thin red ribbon tied through a tweedy button as the embellishment.


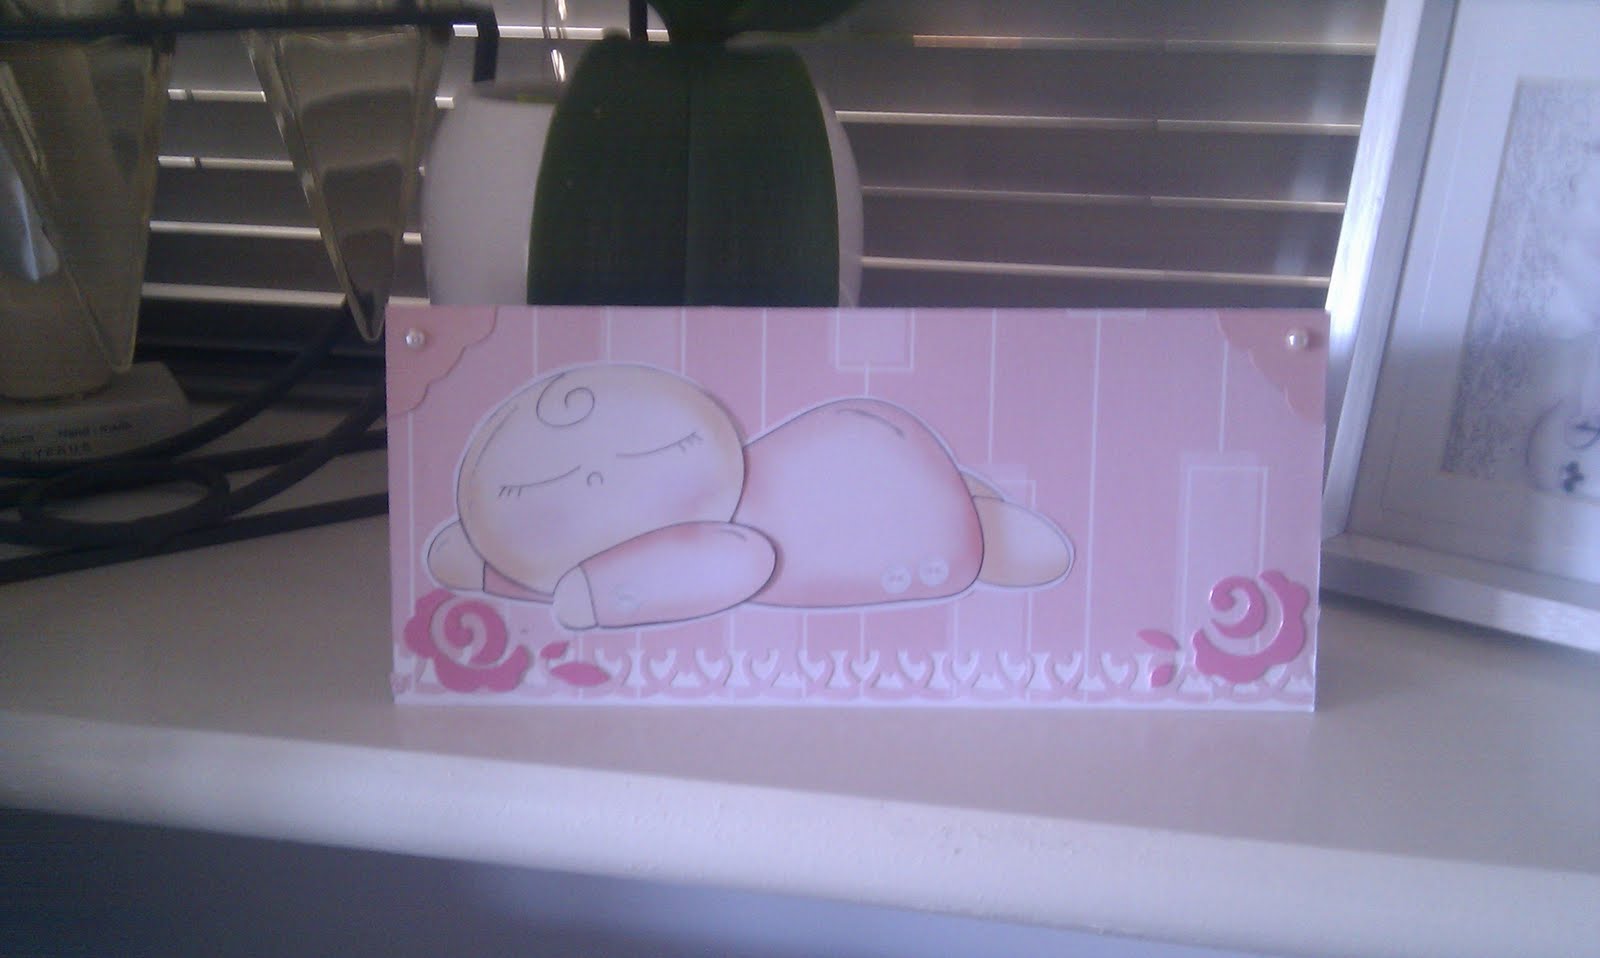
 Next was another decoupage sheet from the same range.  This time glittered the slippers and dotted the apron with glitter.  Layered on some old textured wallpaper found in my bits and bobs box i've been meaning to go through for ages.  Stamped the side border with a couple of SeeDee's stamps I've had for years and never touched before.  Added gems to the centre of each heart.  Then added the ribbon and bow.  Very cutesy - makes me feel a little nauseus but think it's perfect to give to princess M when I see her tomorrow after 3 nights away!


Now this next one took a fair amount of time to get right.  Again the freebie papers from the magazine I bought today and a stamp from a different magazine.  Coloured the image with promarkers, distress inked the white circle with spun sugar.  Punched the circle with Debbie Moore DecoPunch (usually find this fiddly but liked the effect today.  Then cut off part of the front of the card to create and overhand.  Distressed the front of the card with the Spun Sugar and used a little butterfly stamp *from the same freebie set as the main image, to stamp a background using the spun sugar again.  Then used background papers for the inside of the card and for the border along the edge.  Layered up with some dimension for the circle parks and then added the pink gems for a bit of bling on the left.  Finally added the sentiment at the bottom (slight misstamp - but not horrific!)
 For the inside used a panel of white, punched the edge with the DecoPunch to match the circle, inked it and stamped the butterfly randomly again.

And finally my favourite of the evening ...

... well you have to wait for another day as the image I've taken isn't quite good enough so going to take a photo of it tomorrow in day light!

What a tease I am!

Also must get round to posting the pictures of the easter cards M and I made at the weekend.  Got Thursday and Friday off work and I'm sure M and I will get up to some more crafty goodness again then!

Night night for now!  Happy crafting folks!

Friday 8 April 2011

Picture update

So as promised last night have connected my phone and time to upload the pictures of the creations...


firstly apologies for the bad photo - serious back light not a good way of taking a picture but better than nothing.  So anyways ... this is the monster card I made from the CraftArtist make and do section as something completely different!!!  I didn't use strong enough card, so it's a bit on the floppy side but it's a bit of fun and hoping my friends son's think it's nice.


So this is card 1 from Samantha's card class - and even if I say so - gorgeous!!!
The largest of the flowers is three layers with a scalloped circle punch, spritzed with water and scrumpled and brad through the centre - beautiful brad in fact - a felt topped one - so cute!
Second one is a couple of dies from a Tim Holtz set - really lovely set of dies - which we used for the next card too - again scrumpled and arranged with another felt brad.
Next a couple of the smaller flower dies with the pearl centres, and a sizzix die for the leaves.
Also die cut the labels and punched with the Martha Stewart punch (again another lovely one!) and stamped the sentiment in a nice purple colour.
Layered it all up and voila!  Very gorgeous in my humble opinion!


And card number 2!  Tim Holtz dies layered up and shaped and brad for the centre.  Two coordinating papers offset, and the stamped sentiment in brown at the bottom.  Then used lace to tie around and then used the pink and brown ribbons to finish off.  Not quite as cute as the other one - but the lace and ribbon are really cute - feel a bit like a smaller embellishment was called for - but love the papers and the general idea none the less.

So this is the update on yesterdays crafting etc.  Now back to sleep to recover from the confirmed water infection!  The joys!

Thursday 7 April 2011

First layout with CraftArtist and Kirsty Wiseman sketch

Well I did my first layout last night using CraftArtist and followed the Kirsty Wiseman sketch she was doing for her Wednesday crop which I didn't manage to catch all of because my internet connection was on and off all night for some unknown reason.
Only a simple layout to play with one of the new kits I've now got - lovely jubbly!
Then it was time to play with the Make and Do and made a funny little alien thing that I'm giving to a friend at work for her boys - it was just for funand used too thin a card for it to stand properly - but it was cute nonetheless so will post picture another time when I get round to connecting the camera.

Tonight I went out to a card class - Cards by Samantha - and made two lovely creations playing with vintage shabby chic flowers using die cutting machines and punches to make different flowers - really sweet cards I was very impressed with - again will have to post another time when I connect up the camera.

Finally to finish off my crafting night I've designed an Easter card using CraftArtist - lovely kit called Birds - when I get round to printing it off and putting it together I'll put the pic on here.

All in all loved my crafty evenings last night and tonight.

Now sleep for me - suspect I've a water infection at the moment so going to have to get an appointment with the drs tomorrow before heading into work - boo hoo!  But then off to Wales after work to pick up the princess from her grandparents and drive back home!  Such fun!

Night night all and craft away!

Wednesday 6 April 2011

Craft Artist software arrived!

Let the crafting commence once the software has installed!
That's all I have to say on the matter!
Have fun folks!